GitHub Actions is a powerful tool to automate your software development workflows in the same place you store code and collaborate on pull requests and issues. It is a great way to build, test, and deploy your code right from GitHub. GitHub Actions are event-driven, meaning that you can run a series of commands after a specified event has occurred. For example, every time someone creates a pull request for a repository, you can automatically run a command that executes a software testing script. You can use GitHub Actions to build and test your code, deploy your code to a hosting service, run a script, or automate any other repetitive task.
We will build a GitHub Actions workflow from scratch for Spring Boot application. Building workflow on GitHub doesn’t necessarily mean that we always have to start from scratch, as GitHub Actions provides various templates.
1. Create a new GitHub Actions workflow with template
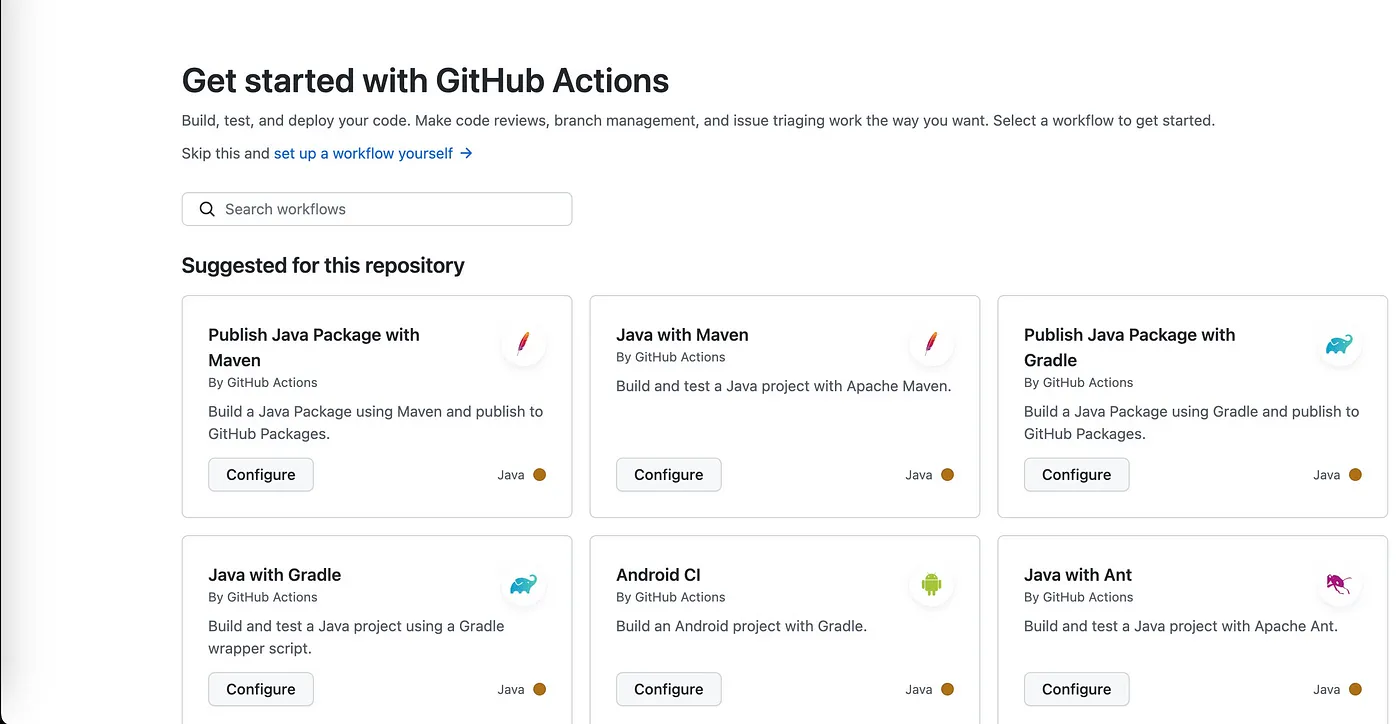
As we see from the GitHub Actions page above, it already suggests a few templates suitable for the Spring Boot application. Let’s start with “Java with Maven”. Click on the “Set up this workflow” button and it will create a new workflow file under .github/workflows directory.
on:
  push:
    branches: [ "main" ]
  pull_request:
    branches: [ "main" ]

jobs:
  build:

    runs-on: ubuntu-latest

    steps:
    - uses: actions/checkout@v3
    - name: Set up JDK 17
      uses: actions/setup-java@v3
      with:
        java-version: '17'
        distribution: 'temurin'
        cache: maven (1)
    - name: Build with Maven
run: mvn -B package --file pom.xml| 1 | cache: maven automatically cache ~/.m2/repository directory that will be automatically restored for the next run. |
Jobs on GitHub-hosted runners start in a clean runner image and must download dependencies each time, causing increased network utilization, longer runtime, and increased cost. To help speed up the time it takes to recreate files like dependencies, GitHub can cache files you frequently use in workflows.
|
Challenge 1: Change JDK distribution from temurin to Microsoft Build of OpenJDK. |
2. Generating a Software Bill of Materials (SBOM) with maven
Generating a Software Bill of Materials (SBOM) has become an increasingly important part of CI/CD practices these days. There are various tools available to generate SBOMs from different sources, such as containers and package managers. Among the tools like Syft, Trivy, sbom-tool,etc., We will use CycloneDX maven plugin to generate SBOMs in the CycloneDX format.
	<build>
		<plugins>
			<plugin>
				<groupId>org.springframework.boot</groupId>
				<artifactId>spring-boot-maven-plugin</artifactId>
			</plugin>
			<plugin>
				<groupId>org.cyclonedx</groupId>
				<artifactId>cyclonedx-maven-plugin</artifactId>
				<version>2.7.5</version>
				<executions>
					<execution>
						<phase>package</phase>
						<goals>
							<goal>makeAggregateBom</goal>
						</goals>
					</execution>
				</executions>
			</plugin>
		</plugins>
	</build>
mvn package will generate a CycloneDX SBOM file (bom.json) under target directory.
|
Challenge 2: Use |
Uploaded artifacts can be downloaded and used by actions/download-artifact action in the next step.
3. Using Azure Artifacts for Maven packages
Azure Artifacts enables developers to share their code efficiently and manage all their packages from one place. With Azure Artifacts, developers can publish packages to their feeds and share it within the same team, across organizations, and even publicly. Developers can also consume packages from different feeds and public registries such as NuGet.org or npmjs.com. Azure Artifacts supports multiple package types such as NuGet, npm, Python, Maven, and Universal Packages.
|
Challenge 3: Challenge 3 is to publish your Spring Boot application to Azure Artifacts. Complete the following 3 steps to complete this challenge. |
Step by Step guide is at https://learn.microsoft.com/en-us/azure/devops/artifacts/get-started-maven?view=azure-devops
|
Challenge 3.1 : Configure pom.xml to publish to Azure Artifacts |
Azure Artifacts provide the basic steps to configure pom.xml to publish to Azure Artifacts. Link above will guide you through the steps. Below is an example of how the pom.xml file looks like to publish the Spring Boot application to Azure Artifacts.
    <distributionManagement>
        <repository>
            <id>changl0368</id>
            <url>https://pkgs.dev.azure.com/changl0368/_packaging/changl0368/maven/v1</url>
            <releases>
                <enabled>true</enabled>
            </releases>
            <snapshots>
                <enabled>true</enabled>
            </snapshots>
        </repository>
</distributionManagement>|
Challenge 3.2 : Generate a Personal Access Token (PAT) to publish to Azure Artifacts |
Create a PAT Token with Packaging (Read & write) scope, and make a note of it. We will use it in the next step.
|
Challenge 3.3 : Configure GitHub Actions to publish to Azure Artifacts. You should use the PAT Token generated in the previous step as a secret. In a nutshell, you should create two GitHub Actions secrets, ARTIFACTS_USERNAME and ARTIFACTS_TOKEN. How to use GitHub Secrets is explained in the link at https://docs.github.com/en/actions/security-guides/encrypted-secrets |
Here is an example of how the GitHub Actions workflow looks like to publish the Spring Boot application to Azure Artifacts. setup-java provides a way to configure the repository credentials for Maven.
    - name: Set up JDK 17
      uses: actions/setup-java@v3
      with:
        java-version: '17'
        distribution: 'microsoft'
        cache: maven
        server-id: changl0368
        server-username: MAVEN_USERNAME
        server-password: MAVEN_PASSWORD
    - name: Publish package
      run: mvn --batch-mode deploy
      env:
        MAVEN_USERNAME: ${{ secrets.ARTIFACTS_USERNAME }}
        MAVEN_PASSWORD: ${{ secrets.ARTIFACTS_TOKEN }}
mvn deploy will publish the Spring Boot application to Azure Artifacts.
